

Mailchimp is a popular email marketing platform that allows businesses and individuals to create and manage email campaigns. One of the key features of Mailchimp is its contact management system, which allows users to organize and segment their email lists for more effective targeting. So if you are looking to perfect your email marketing, you need to know how to export contacts from Mailchimp.
you need to know how to export contacts
If you are an email marketer, you will know that an email with low traffic and click-through rates will automatically be sent to the spam folder. This lowers the probability of your content being viewed by potential customers. That’s why you need to know how to export these contact in order to segment them to the right demography.
To do just that, having them write a survey beforehand on why they would like to subscribe is crucial. Some would like to get a free promo or discount, while others may simply be interested in the content you share. By breaking down your audience, you could potentially increase revenue and drive more customers.
If you would like to learn the basics of email marketing, be sure to check out this article on how to master email marketing.
How to Export Contacts
If you’re using Mailchimp to manage your contacts and want to export them for use in another system, there are a few simple steps you can follow.
Step 1: Log in to your Mailchimp account To begin
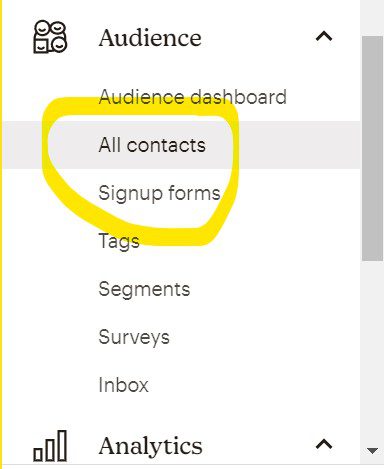
Login into your Mailchimp account and navigate to the audience dashboard. This is where you’ll find all of your contact lists and segmentation options.
Step 2: Select the contact list you want to export
Once you’re on the audience dashboard, select the contact list that you want to export by clicking on it. This will take you to the list view, where you can see all of the contacts in that list.
Step 3: Click the “Export Audience” button

In the list view, you should see a button labeled “Export Audience” near the top of the page. Click this button to begin the export process.
Step 4: Choose your export options
When you click the “Export Audience” button, a pop-up window will appear with several options for exporting your contacts. You can choose to export all of your contacts or just a specific segment of your list, depending on your needs. You can also choose the format of your export file, such as CSV, XLSX, or TXT.
Step 5: Customize your export fields
In addition to choosing your export format, you can also customize which fields you want to include in your export. By default, Mailchimp will export all of the standard contact fields (such as name, email address, and signup date), but you can also choose to include any custom fields you’ve created.
Step 6: Start the export process
Once you’ve selected your export options and customized your fields, click the “Export” button to begin the export process. Depending on the size of your contact list, this may take a few minutes to complete.
Step 7: Download your export file
When the export process is complete, Mailchimp will generate a file containing your contact data in the format you selected. You can download this file by clicking the “Download” button that appears on the export page.
To Sum Up
Here is a quick summary to export contacts from Mailchimp. Follow these steps:
- Log in to your Mailchimp account and navigate to the Audience tab.
- Click on the Audience you want to export.
- Click the “Export Audience” dropdown menu and select “Export Audience.”
- In the “Export Audience” modal, select the “CSV” file type.
- Choose the “Groups and Tags” options that you want to include in your export.
- Choose the “Export All Contacts” option to export all contacts in your audience or choose “Export Segment” to export a specific segment of your audience.
- Click “Export Audience” to start the export process.
Mailchimp will then begin processing your export request and will send an email notification with a download link to your exported CSV file once the export is complete. You can then use this CSV file to import your contacts into another platform or use the data for analysis or reporting purposes.